
I received so many nice comments about my nails in the last post that I decided to share a funky manicure technique called water marbling. This process is not for the faint of heart. Buried under a mound of acetone-soaked cotton balls, I think I finally got it down. Basically, you create a marble design on the surface of some water, then dip your nail right into the design, and the design transfers right onto your nail! Here are the step-by-step instructions.
What you will need:
-At least two nail polish colors
-Clear top coat
-A small container of room temperature water (Make sure this is a container you don't mind getting polish on.)
-Toothpicks
-Tape


1) First paint your nails with one coat of the polish that you want to be your base. One coat is sufficient.

2) Use tape to cover all the skin around your nail, and wrap it around your fingertips as well. I cover just about a third of my finger because that part will be submerged in polish. Don't forget to get under your nail. The tape is kind of hard to see in the photos.
 |  |
3) Loosen the caps of the polishes you'll be using for marbling. Choose your first color and let a drop fall onto the surface of the water in your cup. Make sure you do not touch the water with your brush because this will ruin your bottle of nail polish, but don't hold your brush too high, because this may cause your droplet to sink to the bottom of the water.
 |  |
4) In rapid succession, drop a bead of a different color within the circle of the previous polish, until you have something that looks like a bullseye.
 |  |
 |  |
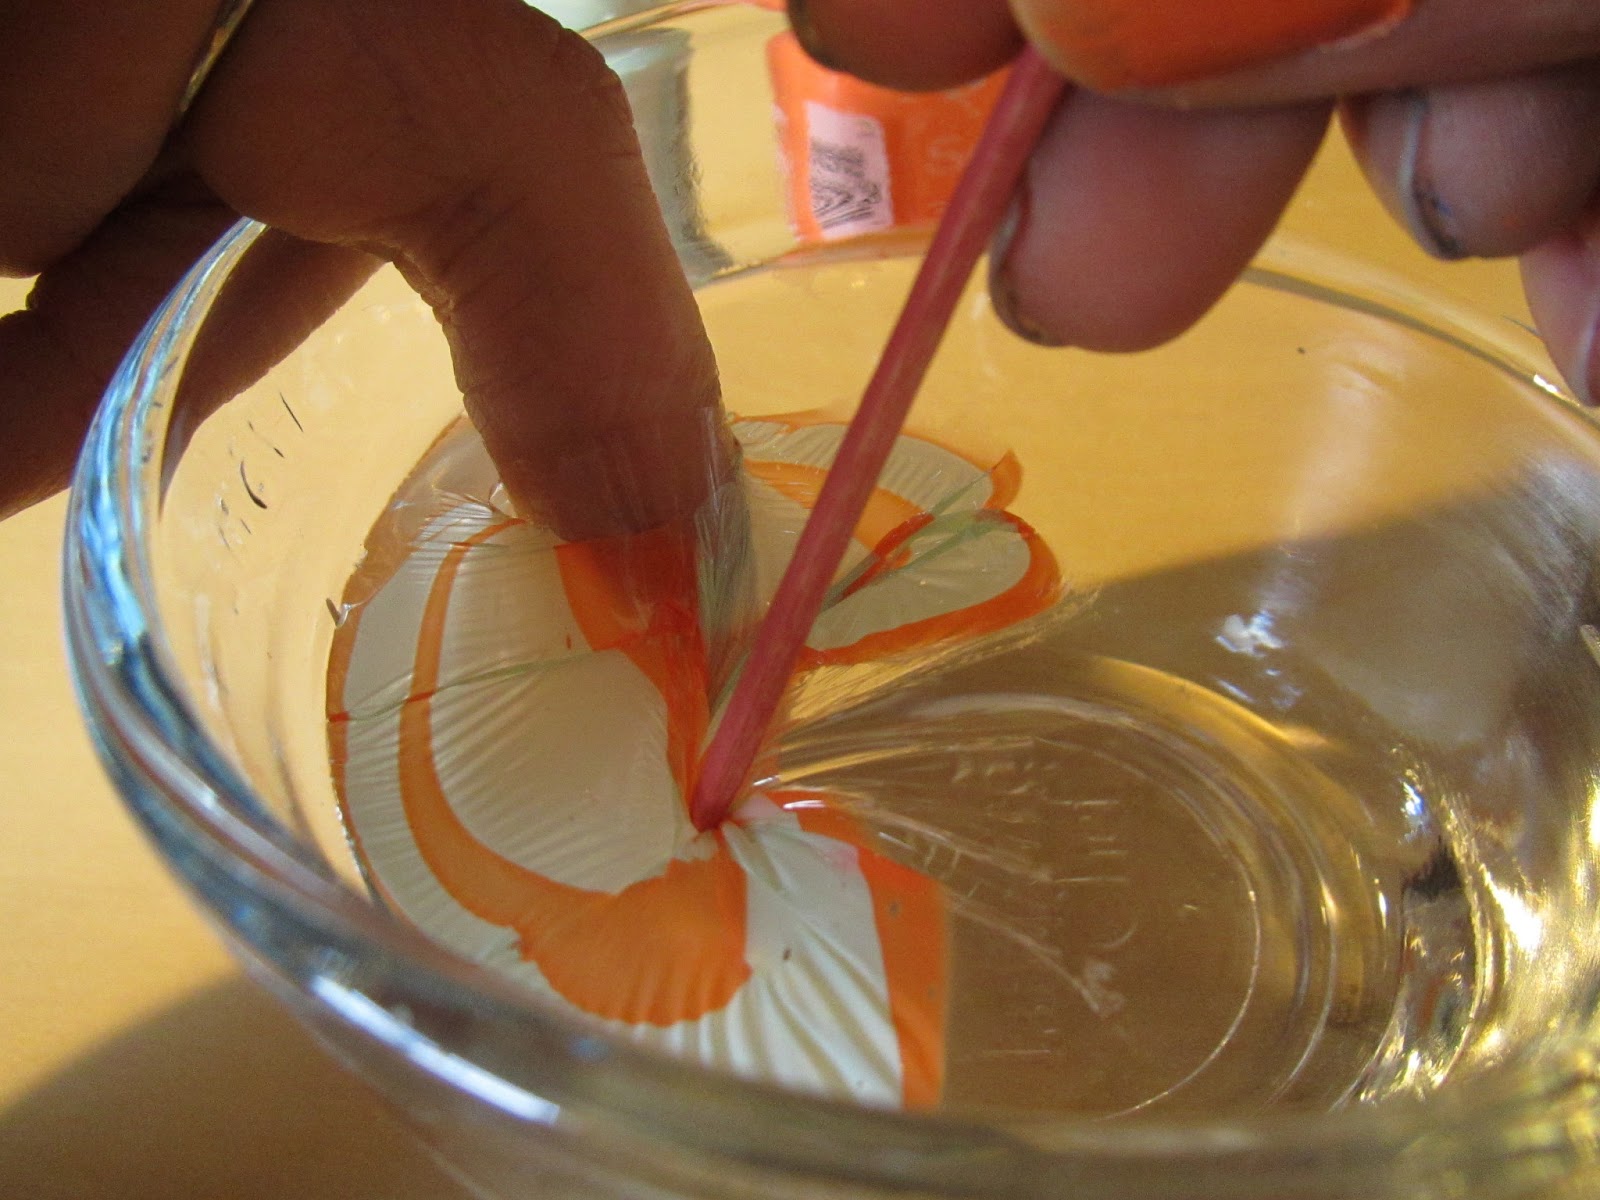
5) Now comes the fun part. Create a marble design in the polish by dragging a toothpick through the colors, as seen in the photos.


6) Dip your taped-up finger, nail-faced-down, into your favorite part of the design.

7) Hold your finger in the water for a few seconds as the rest of the polish on the water surface dries a little. I blow on the polish a bit to rush the process. Collect the excess polish by twirling your toothpick in it. If you don't collect the excess polish, your finger may be re-coated upon removal, probably with a design you don't like!
 |  |
8) When all the excess polish is collected, take your finger out of the water. Hopefully you have a super-cool design! Go ahead and remove the tape.
 |  |
10) Remove any stray polish with a Qtip and some polish remover, and when your polish has dried, apply a good quality top coat, so that you can enjoy your art for a long time!
You can do just one or two nails for a more conservative look, or go crazy with all your digits! I like to do just a couple colors, but I've seen awesome nails with various colors! Just depends what you like, and how much polish you have!


Send me a photo if you decide to try it!