Wednesday, May 8, 2013

MARBLE-OUS


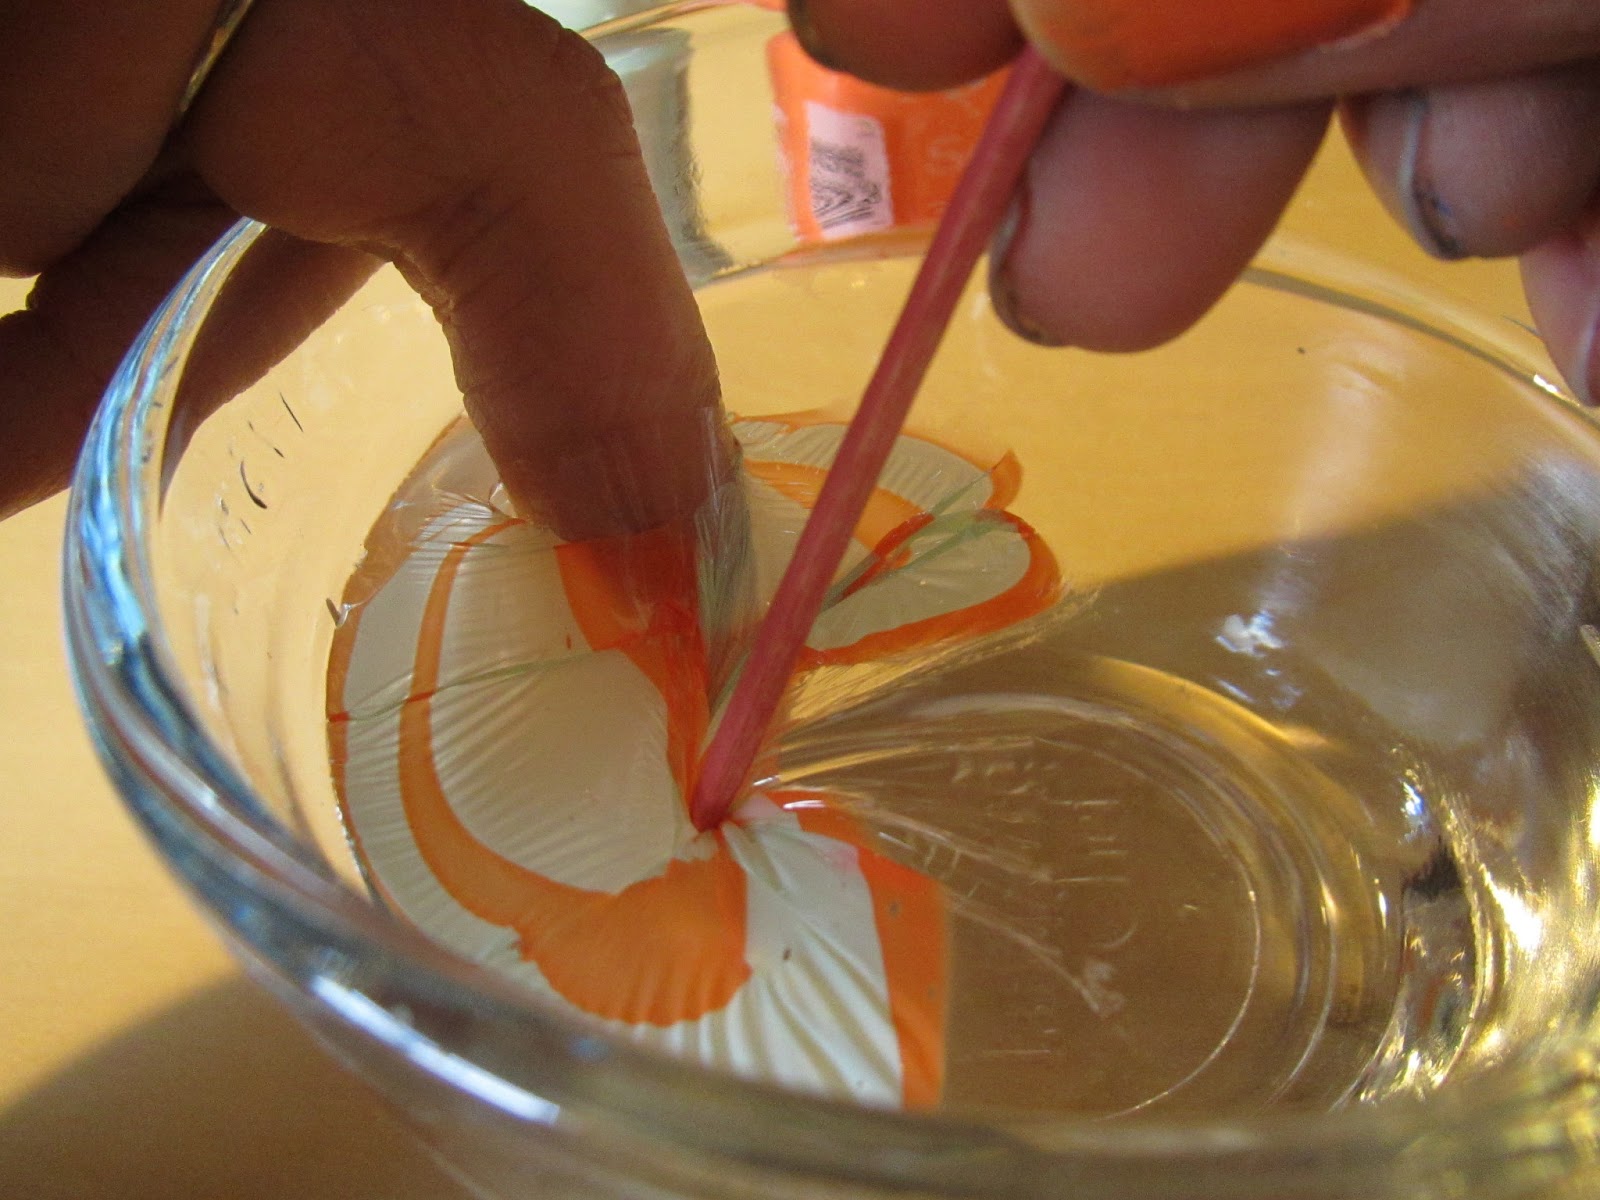
I received so many nice comments about my nails in the last post that I decided to share a funky manicure technique called water marbling. This process is not for the faint of heart. Buried under a mound of acetone-soaked cotton balls, I think I finally got it down. Basically, you create a marble design on the surface of some water, then dip your nail right into the design, and the design transfers right onto your nail! Here are the step-by-step instructions.

What you will need:

-At least two nail polish colors
-Clear top coat
-A small container of room temperature water (Make sure this is a container you don't mind getting polish on.)
-Toothpicks
-Tape


1) First paint your nails with one coat of the polish that you want to be your base. One coat is sufficient.


2) Use tape to cover all the skin around your nail, and wrap it around your fingertips as well. I cover just about a third of my finger because that part will be submerged in polish. Don't forget to get under your nail. The tape is kind of hard to see in the photos.


3) Loosen the caps of the polishes you'll be using for marbling. Choose your first color and let a drop fall onto the surface of the water in your cup. Make sure you do not touch the water with your brush because this will ruin your bottle of nail polish, but don't hold your brush too high, because this may cause your droplet to sink to the bottom of the water.


4) In rapid succession, drop a bead of a different color within the circle of the previous polish, until you have something that looks like a bullseye.


5) Now comes the fun part. Create a marble design in the polish by dragging a toothpick through the colors, as seen in the photos.


6) Dip your taped-up finger, nail-faced-down, into your favorite part of the design.


7) Hold your finger in the water for a few seconds as the rest of the polish on the water surface dries a little. I blow on the polish a bit to rush the process. Collect the excess polish by twirling your toothpick in it. If you don't collect the excess polish, your finger may be re-coated upon removal, probably with a design you don't like!

8) When all the excess polish is collected, take your finger out of the water. Hopefully you have a super-cool design! Go ahead and remove the tape.


10) Remove any stray polish with a Qtip and some polish remover, and when your polish has dried, apply a good quality top coat, so that you can enjoy your art for a long time!

You can do just one or two nails for a more conservative look, or go crazy with all your digits! I like to do just a couple colors, but I've seen awesome nails with various colors! Just depends what you like, and how much polish you have!


Send me a photo if you decide to try it!

Saturday, April 13, 2013

AN EARFUL


Out of sight, out of mind, out of rotation. That's how I feel about so many of my belongings, and most especially with anything I wear...clothes, shoes, and accessories. So this project does double-duty: displaying our beautiful baubles as dresser decor, whilst reminding us to actually wear them!

All you need to create this decorative earring holder are:

-a large picture frame (I used 14x17in frame)
-some wire (bead stringing wire)
-thumb tacks


1) Cut a piece of wire about three times the width of your frame. I cut about 42 inches. Tie a knot in the middle of your piece of wire.


2) Continue to tie knots in the wire until your "chain" spans the width of your frame. It's easiest to do this by anchoring your wire to something. I just anchored mine to the picture frame, using one of the thumb tacks. (In reality, I just held the wire between my teeth, but I wanted to spare you the awkwardness.)


3) Make as many strands as you desire, keeping earring dangling length in mind. I made four strands.


4) Tack the strands tightly onto the frame.


5) A couple minutes later, and you're ready to start hanging your pretty earrings!


My accessorizing has increased significantly. And I will also hypothesize that this project reduces thoughtless spending. My social scientist husband agrees: "What people don't realize is that organizing your clothes and accessories helps you make the most of what you have." I think we may have a budding fashion blog contributor on our hands.

Wednesday, March 20, 2013

TIME FLIES

It has been four years of blessings and bliss since this happened:


Each year has been better than the last.


In celebration, here are a few of my favorite DIY projects from that lovely day.

Hand-painted direction signs on reclaimed barn wood

Gold spray-painted IKEA votive lanterns, carried by my little "lantern girls"

My adorable "lantern girls"

Grocery store bridal bouquet
Monogram wreaths made with artificial flowers

Monogram wreaths - one of my favorite projects...Tutorial to come!

Ceremony programs

Cute sign to welcome you to the candy buffet favors

Favor boxes for candy buffet with personalized monogrammed tags

Gorgeous monogram decoration on my delicious cake

The wonderful thing about a cheap wedding is that all of your friends' talents shine bright like a diamond. Like an engagement ring diamond.

My friend Aaron went so far as to knock on the doors of people with old barns to ask them for old wood, and those old barn people weren't that nice. So four years later, I still want to thank my talented and creative friends and family for their help in making that day so happy.

A great introduction to a happy marriage.

*All photos courtesy of our wonderful friends at DSW Photography.

Monday, March 4, 2013

SO SUCCULENT

Succulent. One of those words that sounds like what it means, no? Juicy. Fleshy. Moist. But I promise this tutorial won't make you feel as uncomfortable as those words do.


Everyone needs a little greenery in their lives. Studies have shown that having plants in your home or office can actually improve your health and productivity! But if you're like me, and you tend to kill your plants before they even have a chance to make you skinny and successful, and you end up with a lower self-esteem and realize your lack of nurturing instinct, then succulents might be the plant for you!

One of my favorite indoor plant arrangements is the succulent garden. And I'm hoping it's as easy to take care of as it is to create! Here are the steps.

1) Choose a planter that will fit your selection of succulents. I found some containers at the local thrift store for a couple bucks. I used the large green bowl for this succulent garden. I still need to drill a hole in the bottom for drainage.


2) Choose which succulents you will be potting together. I'm not an expert on succulents yet, so this might not be the optimal grouping, but we love experimentation in this household. I chose varying colors, heights, and leaves. Put a little soil in the bottom of your planter. I picked up some cactus and succulent soil at the store, hoping that this will help my brown thumb.


3) Remove your plant from its junky plastic pot, and lightly loosen up the dirt and roots.


4) Place firmly in the planter, using more or less dirt to stand the plant up. Repeat with the other succulents, and play around with them until you're pleased with the arrangement.


5) Top off with more soil to cover the roots, and voila! An adorable little garden display to make your home a happier and healthier place!


Through my extensive research on Wikipedia, I learned that virtually all cacti are succulents but not all succulents are cacti. I'm not in love with prickly plants, so I lean more toward fat and juicy-looking leaves. We all remember how cacti survive in the cruel desert heat, right? A succulent's fleshy parts are adapted for storing moisture in times of drought. And there will be times of drought. In my home. Because I forget to water my plants. So this plant is well-adapted to my neglectful ways.

Click here for tips on caring for your succulents from our friends at the Cactus and Succulent Society of San Jose, of which I would like to be president someday.